
Command an Army Sword and Shield Guide: Best Class and Troop Strategies
Master the command an army sword and shield class with our comprehensive guide. Learn troop counters, ascension tips, and battlefield strategies to win.
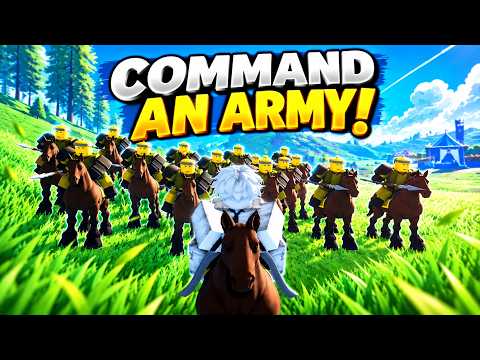 Official mediaMaster the command an army sword and shield class with our comprehensive guide. Learn troop counters, ascension tips, and battlefield strategies to win.YouTube
 The sudden surge of Roblox strategy games has brought a massive influx of new players to the battlefield, all looking for the most effective way to lead their units. If you are just starting your journey, selecting the command an army sword and shield class is widely considered the most reliable way to survive the early-game chaos. By choosing the command an army sword and shield setup during the initial tutorial, you grant your character the ability to mitigate incoming damage while learning the complex rock-paper-scissors mechanics of troop management.
Choosing Your Path: The Sword and Shield Class
When you first launch the game, you are presented with a non-skippable tutorial that asks you to choose between three primary classes: Assassin, Hammer, or Sword and Shield. While it is tempting to go for the high-burst damage of the Assassin or the shield-breaking power of the Hammer, the Sword and Shield is the definitive "safety net" for newcomers.
It is important to understand that your class choice primarily dictates how your avatar fights on the front lines, rather than changing the stats of your troops. Community reports suggest that the ability to block (using the F key) is invaluable when you are caught out of position. If you later decide that the defensive playstyle isn't for you, be prepared to spend 50 Gems to switch to a different class.
| Class | Primary Benefit | Recommended For |
|---|---|---|
| Sword and Shield | High survivability and blocking | Beginners and frontline tanks |
| Assassin | High mobility and burst damage | Advanced players focused on player-killing |
| Hammer | Massive block damage | Countering shield-heavy defensive teams |
Mastering the Controls and Keybinds
Success on the battlefield requires more than just picking the right class; you must be able to micromanage your units with precision. The game uses a unique control scheme that separates your character's actions from your army's maneuvers. Familiarizing yourself with these keybinds is the first step toward becoming a legendary commander.
Troop Command Keybinds
| Action | Keybind | Description |
|---|---|---|
| Hold | X | Orders troops to stay in a specific formation at a location. |
| Follow | C | Troops will move with your character and guard you. |
| Attack | V | Orders an aggressive charge toward the nearest enemy. |
| Rush | B | A high-damage dash ability (best used with Cavalry). |
Personal Combat Keybinds
| Action | Keybind | Strategic Use |
|---|---|---|
| Attack | Left Click | Standard melee swings. |
| Block | F | Essential for the command an army sword and shield class to mitigate HP loss. |
| Roll | Q | Uses stamina to dodge out of dangerous AOE attacks. |
| Heal | H | Restores health; requires you to be at a safe distance. |
| Mount | G | Summons your horse for extra mobility and a secondary health bar. |
The Art of Counter-Play: Understanding Troop Types
Experienced players often point out that this game shares significant DNA with the Steam title Conqueror's Blade, particularly in how different unit types interact. To dominate, you must understand the counter-system. Using the wrong unit against a specific enemy type is the fastest way to lose your entire battalion.
For example, if you see a player stacking shield units on a capture point, sending in a standard Sword and Shield unit will result in a stalemate. Instead, you should deploy units with high "Block Damage." You can check a unit's specific capabilities by hovering your mouse over them in the menu to see if they possess shield-breaking traits.
Essential Troop Counters
- Hammers (Mace): These are the ultimate counters to shield-heavy formations.
- Spearmen (Halberdiers): The primary defense against Cavalry. Never charge horses into a wall of spears.
- Cavalry (Scout Riders): Excellent for flanking archers and swordsmen, but fragile against sustained melee.
- Archers: High damage from a distance, but they require a "meat shield" of infantry to protect them.
- Samurai: A specialized unit that shreds through shield stacks with high-speed attacks.
| Unit Type | Strong Against | Weak Against |
|---|---|---|
| Shield Units | Archers, standard Melee | Hammers, Samurai, Javelins |
| Spearmen | Cavalry, Scout Riders | Archers, Flanking Maneuvers |
| Cavalry | Archers, Lone Players | Spearmen, Halberdiers |
| Archers | Spearmen (at range) | Cavalry, Assassins |
Building a Balanced Beginner Team
When you are starting out, your "Star Capacity" is limited. You cannot simply equip four-star units immediately. You begin with a capacity of 6 stars, which increases as you level up your account. This forces you to make strategic choices about which low-tier units to invest in.
Player experience suggests that you should always aim for a balanced loadout if you are playing solo. A recommended starter team includes:
- One Shield Unit: To hold the line and soak up damage.
- One Spear Unit: Specifically the Halberdier, to counter enemy horses.
- One Ranged Unit: The basic Archer is excellent because it evolves into the powerful Flame Archer.
- One Cavalry Unit: The Scout Rider, which eventually evolves into a heavy Lancer.
Progression Systems: Ascension and Evolution
One of the most common mistakes new players make is deleting duplicate units. In the command an army sword and shield meta, duplicates are the key to power. By visiting the Ascension Tree in the lobby, you can combine two identical units to increase their "Ascension Level."
The Ascension Process
- Ascension 1: Combine two base units.
- Ascension 2: Combine two Ascension 1 units.
- Ascension 3: Combine two Ascension 2 units (This is the current maximum).
Once a unit reaches Mastery Level 20, they become eligible for Evolution. This transforms a low-tier unit into a higher-tier version with better stats and new abilities. For instance, the basic Shieldman eventually evolves into the Imperial Wall, a unit with massive defensive capabilities.
| Base Unit (1-Star) | Evolved Form (3 or 4-Star) | Why It’s Good |
|---|---|---|
| Archer | Flame Archer | Adds burning DOT (Damage Over Time) to attacks. |
| Shieldman | Imperial Wall | Unmatched blocking stats for point defense. |
| Scout Rider | Lancer | Devastating rush damage that can wipe squads. |
| Halberdier | Elite Halberdier | The best anti-cavalry unit in the game. |
Advanced Battlefield Strategies
To maximize your Gem earnings and win rate, you need to look beyond simple combat. The game rewards performance; the higher your score at the end of a match, the more Gems you receive for future summons.
Utilize the Mount
Your horse is more than just a taxi. When you are mounted, the horse provides an additional health bar. Enemies must deplete the horse's HP before they can damage your character. If your mount dies, there is a one-minute cooldown before you can summon it again. Use this "buffer" health to scout dangerous areas or escape a losing fight.
The Importance of Resupply Points
Every map features resupply points. Capturing these allows your team to replenish lost troops without walking all the way back to the main spawn. Taking a resupply point sneakily can force the enemy team to retreat, as they lose their ability to reinforce the front lines quickly.
Flanking and Rushing
If you are using units with a "Rush" ability (Keybind B), never hit the enemy head-on if they have shields raised. Instead, maneuver your troops to the side or rear. A cavalry rush from the back can ignore a unit's block chance and deal massive critical damage. This is particularly effective against players who are overly reliant on the command an army sword and shield defensive stance.
Earning Gems and Summoning
Gems are the lifeblood of your progression. You need them to summon new units and switch classes.
- Daily and Weekly Quests: These are the most consistent sources of Gems.
- Performance Bonuses: Focus on capturing points and getting player kills. Player kills provide significantly more points than troop kills.
- Codes: Developers frequently release codes that provide hundreds of free Gems. Always check the official social media channels for the latest updates.
- Group Rewards: Joining the developer's Roblox group and liking the game can grant a one-time bonus of 400 Gems.
FAQ: Command An Army Tips
Which class is best for solo players?
While the Assassin is great for roaming, the command an army sword and shield class is generally better for solo players. It allows you to stay alive longer on capture points, giving your troops more time to do their jobs. Staying alive is crucial because if your character dies, your troops will eventually retreat or be wiped out.
How do I break through a team stacking shields?
If the enemy is "turtling" with shields, you need to switch to units with high block damage. The Hammer class, Mace units, Samurai, and Javelins are specifically designed to break through blocks. Additionally, flanking with a high-speed rush can often bypass the shield's frontal protection.
Should I sell my 1-star units?
No! You should keep your 1-star units until you have reached Ascension 3. Once a unit is maxed out at Ascension 3, any further duplicates can be deleted for a small Gem refund. Deleting them early wastes the potential to evolve them into powerful end-game units like the Flame Archer or Imperial Wall.
Does my class affect my troop stats?
No, your class choice (Assassin, Hammer, or Sword and Shield) only affects your player character's weapon, skills, and stats. Your troops' performance is determined by their own level, ascension, and evolution status. However, a command an army sword and shield player can better protect their troops by acting as a physical barrier on the front lines.
Related Guides
Finding the Command an Army Best Class: A Comprehensive Guide to Choosing Your Playstyle
Struggling to pick your starting role? Discover the Command an Army best class for your strategy and dominate the battlefield with our expert breakdown.
How to Command an Army: Assassin Strategies and Ultimate Unit Guides for Roblox Siege
Master the battlefield in Roblox's Command an Army. Learn how to command an army assassin effectively, optimize your unit loadouts, and dominate with pr...
Master the Command an Army Hammer Class: Strategies, Builds, and Combat Tips
Unlock the full potential of the Command an Army Hammer class. Learn about heavy melee tactics, troop synergies, and how to dominate the battlefield.